Mastering SLAs in Jira Service Management: A Practical Guide

Today, let's continue our mini blog and YouTube mini-series dedicated to JSM and explore something that often seems more complicated than it really is—service Level Agreements (SLAs) in Jira Service Management. After working with Jira for over 12+ years, I've noticed that people sometimes get overwhelmed by SLAs or ignore them, but SLAs are actually pretty straightforward once you understand the basics.
Mastering SLA in Jira
The Essence of SLAs
At its core, an SLA is simply a promise of service delivery time. In Jira Service Management, it's a built-in feature that helps you track and maintain these promises. You'll know you've breached an SLA when you see that red indicator screaming at you from your dashboard - it's Jira's way of saying, "Hey, you might want to look at this!"
Getting Started with Calendar Setup
Before diving into SLA configuration, let's talk about something that's often overlooked - calendar setup. This is crucial, especially if you're:
- Working across different time zones
- Managing multiple office locations
- Dealing with different working hours
- Handling various holiday schedules
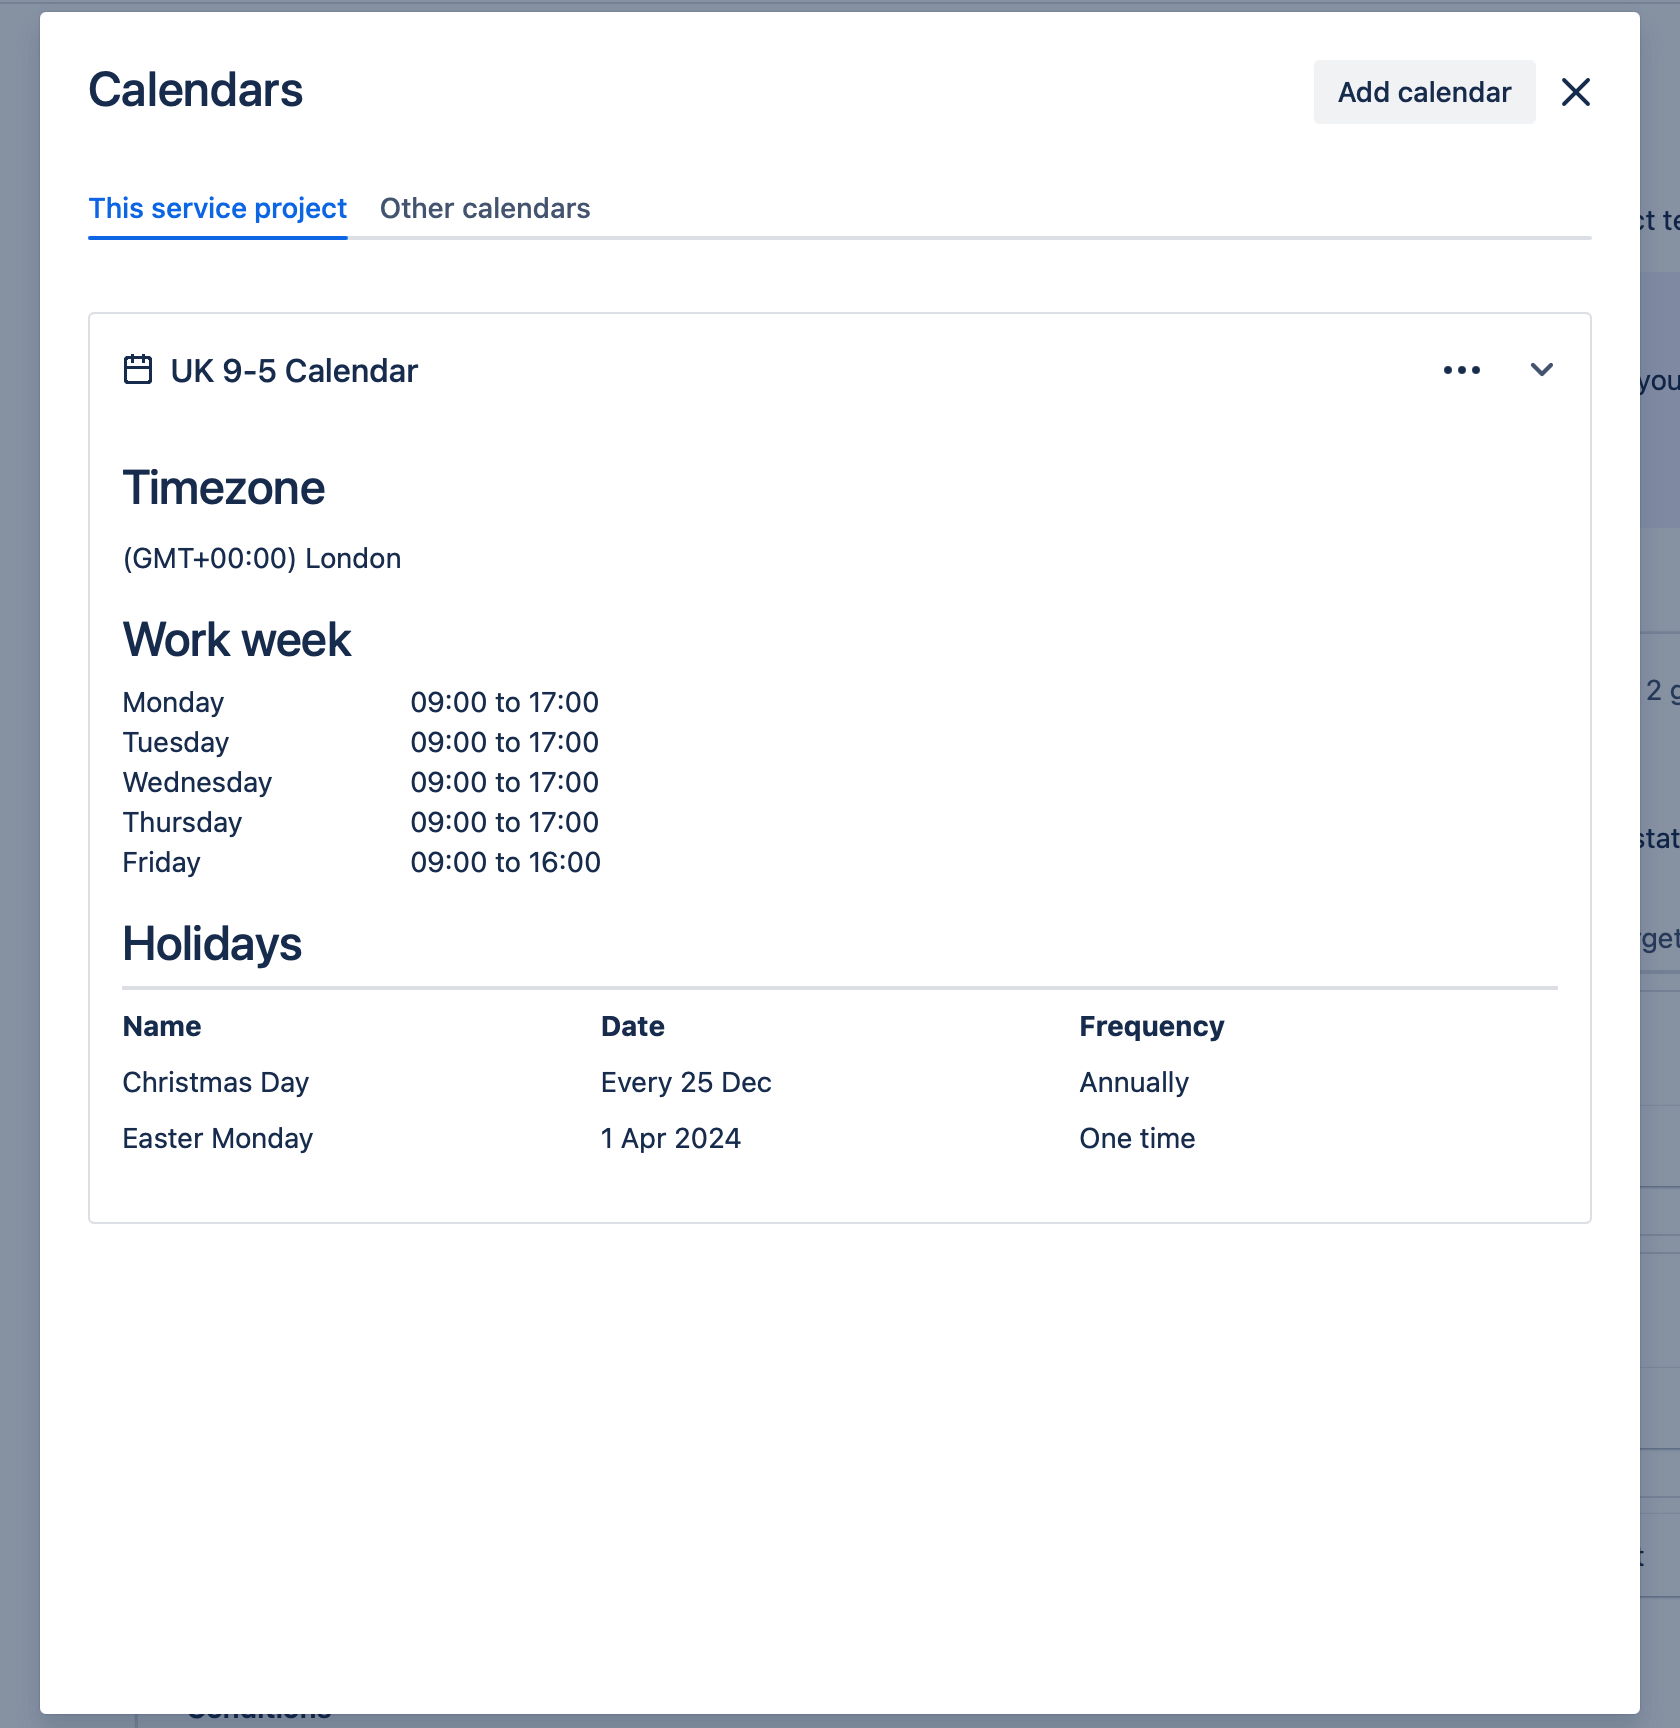
For example, if you've got offices in London, Warsaw, and New York, you'll need different calendars to manage your SLAs effectively. Each location might have different working hours and definitely different holidays. Think about it - when it's a bank holiday in the UK, your London team won't be counting SLA time, but your New York team will be business as usual.
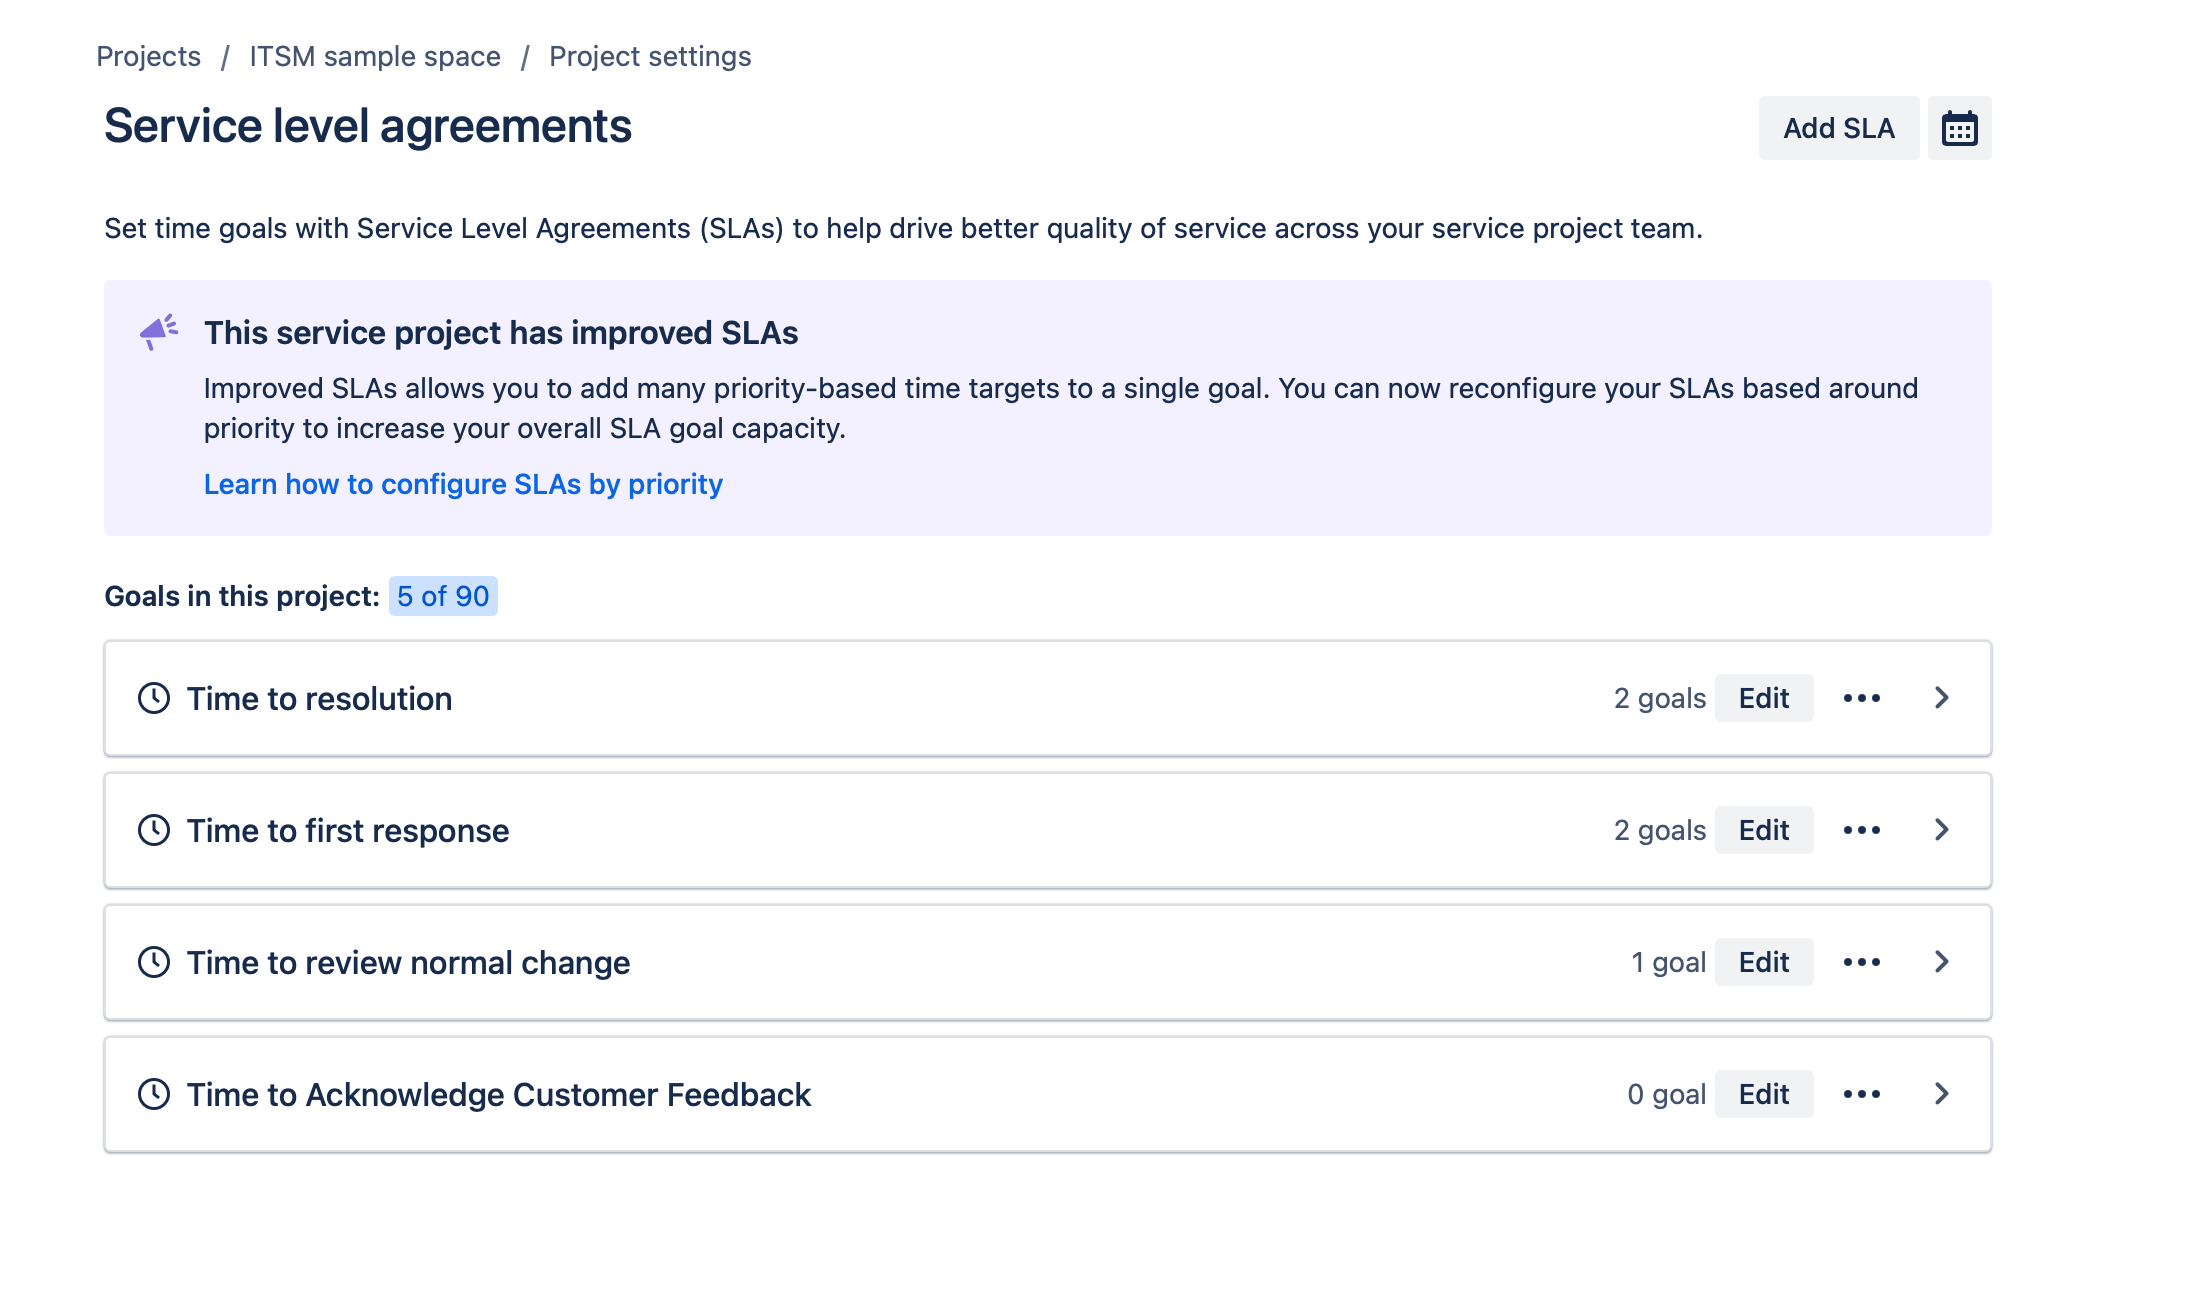
Setting Up Your SLAs
Here's what I've found works best for most teams:
1. Time to First Response
This is your bread-and-butter SLA. You can set different response times based on issue types:
- Incidents might need a 2-hour response
- Service requests could have a 4-hour window
- Change requests might get a more extended timeframe
2. Time to Resolution
The big one is how long it will take until the issue is completely resolved. Remember to:
- Set realistic goals based on issue complexity
- Configure pause conditions (more on this below)
- Consider your team's capacity
The Magic of Pause Conditions
This is where things get interesting. You'll want to pause your SLA clock when:
- You're waiting for a customer response
- External factors block the issue
- During non-working hours
- On holidays
Pro tip: Always set up a "Waiting for Customer" status in your workflow and configure it to pause the SLA. This will prevent unfair SLA breaches when you're actually waiting on someone else.
A Word About Default Settings
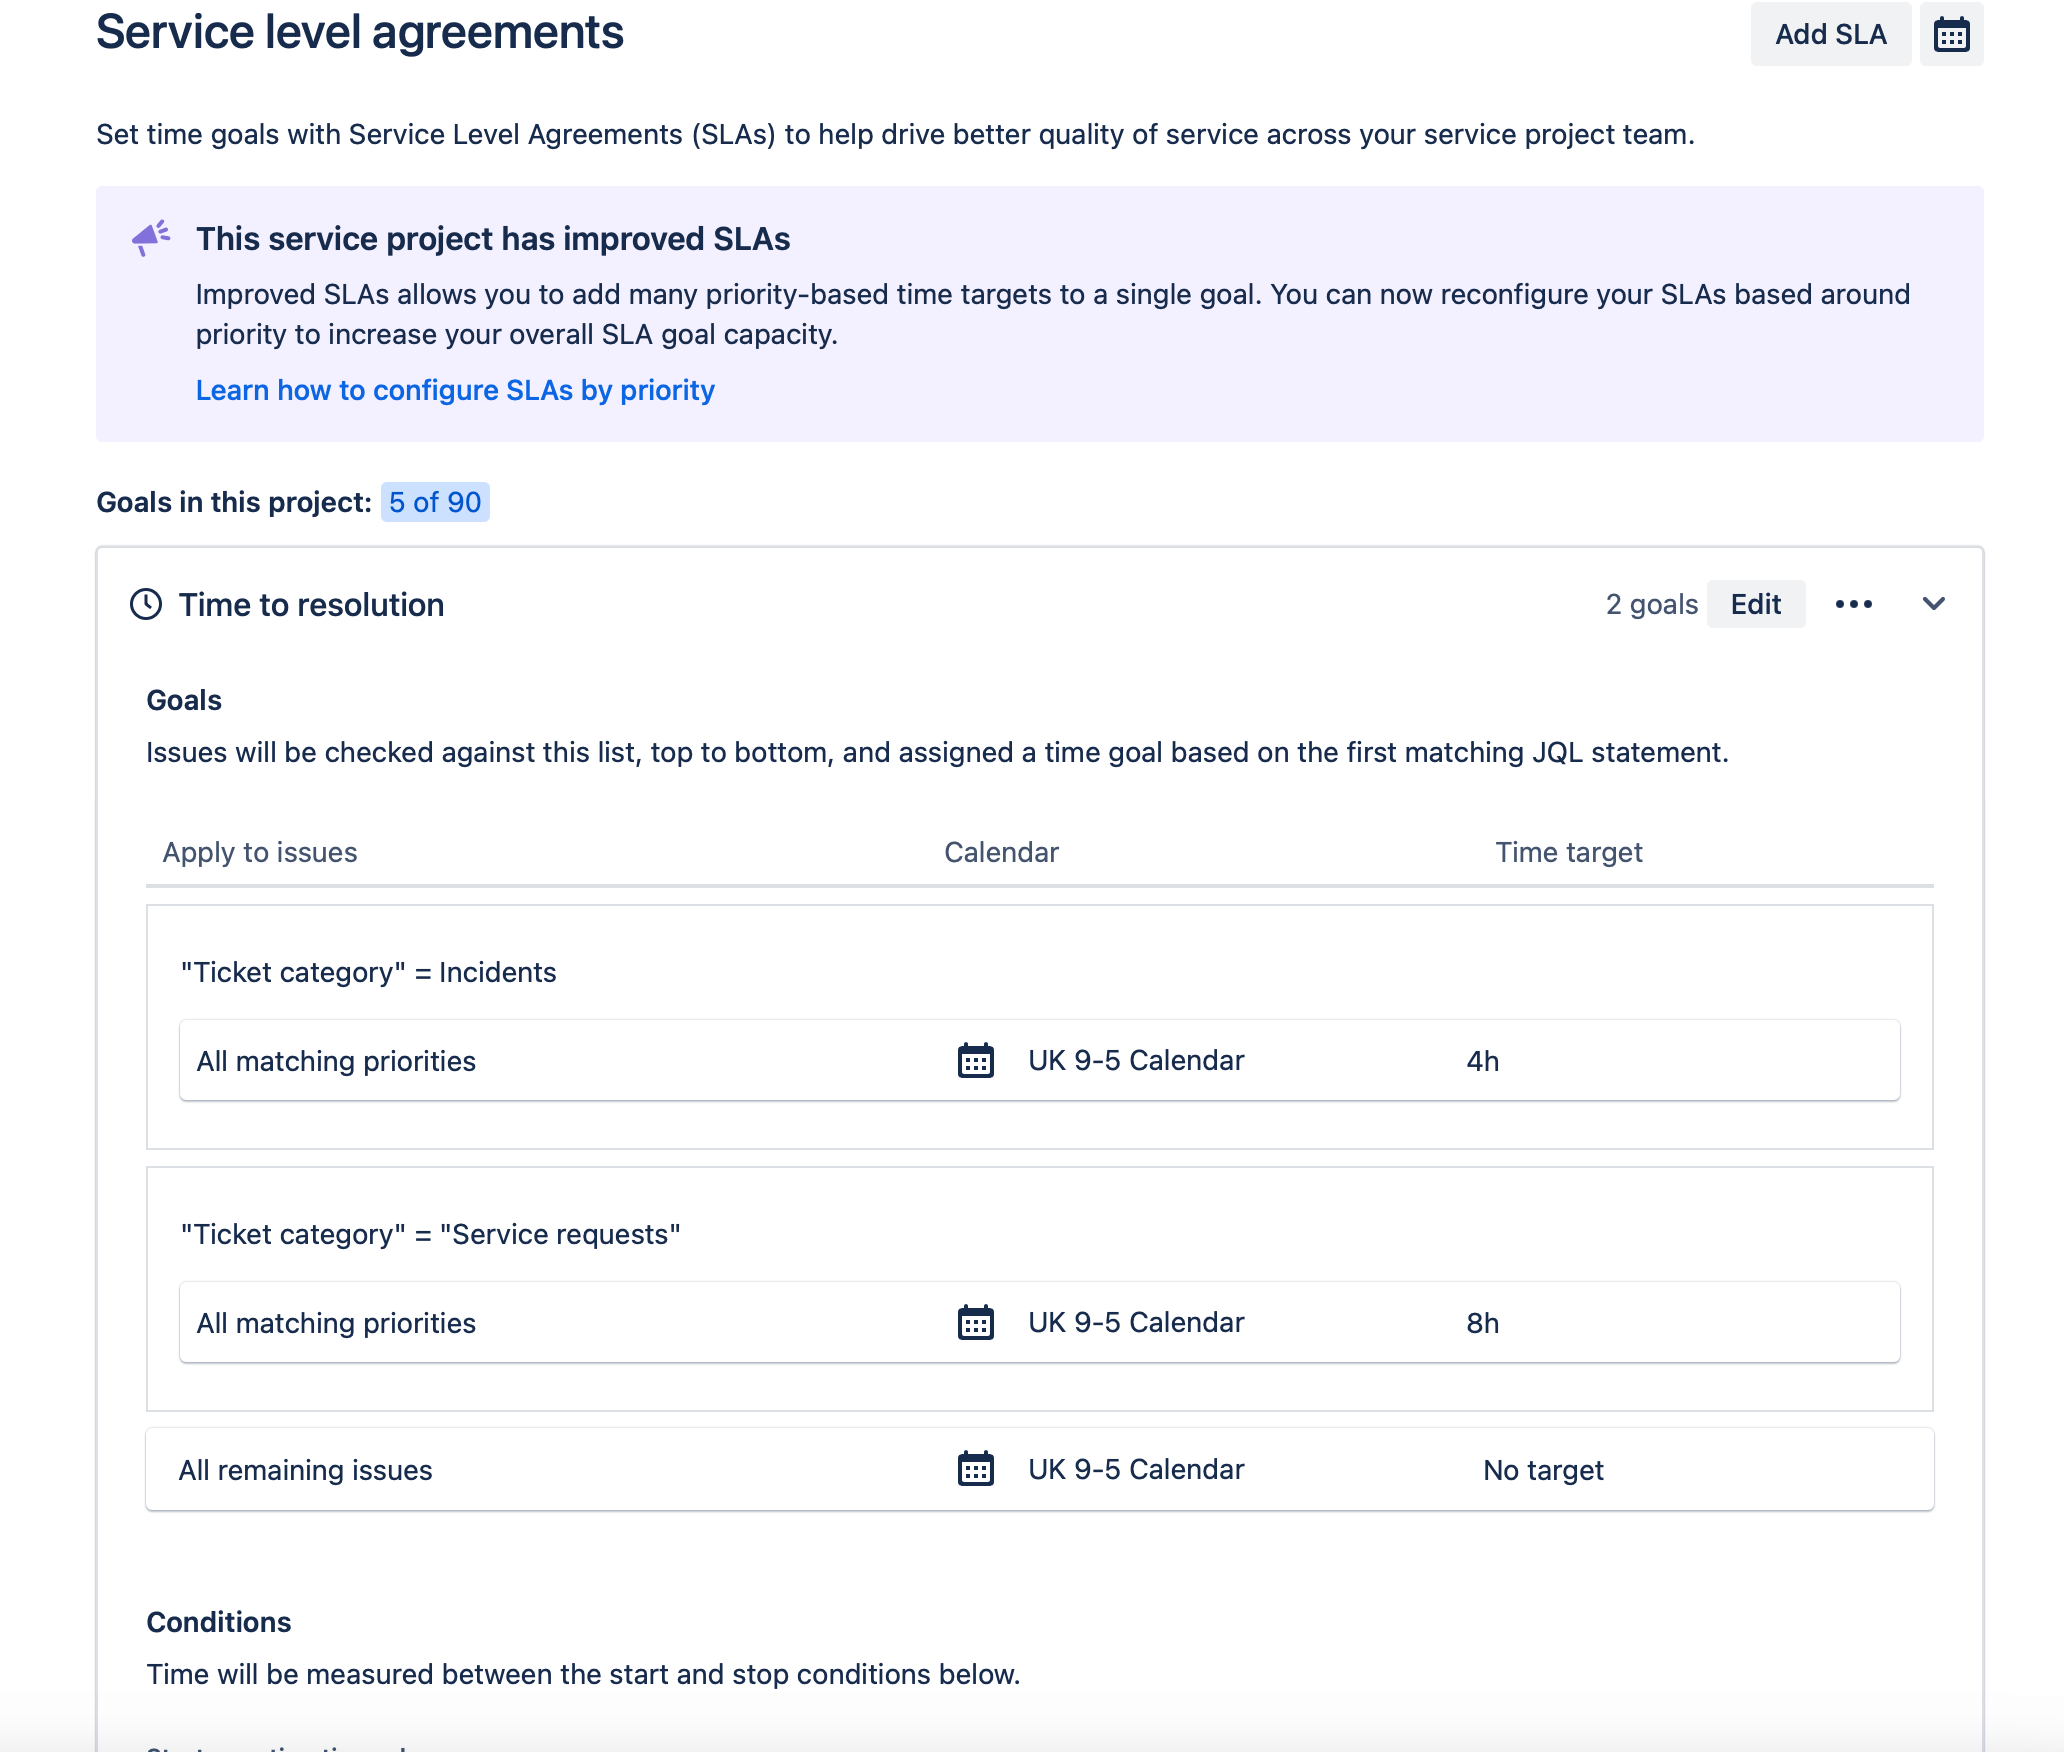
Here's something that might surprise you - Jira's default SLA configuration is actually pretty solid. While you can create up to 90 different SLAs (yes, really!), most teams only need 2-4:
- Time to first response
- Time to resolution
- Perhaps a couple of custom ones for specific workflows
The Migration Consideration
One important heads-up: if you ever need to switch between team-managed and company-managed projects, there's no simple "convert" button. You'll need to:
- Create a new project
- Move all your tickets manually
- Reconfigure your SLAs
- Be prepared for some historical data reset
Best Practices
To wrap this up, here are my top recommendations:
- Start simple - don't overcomplicate your SLA structure
- Align SLAs with your business hours and holiday calendar
- Use pause conditions wisely
- Monitor and adjust based on team performance
- Keep your resolution statuses clear and consistent
Remember, SLAs aren't just about meeting metrics - they provide reliable customer service. Please keep it simple, make it work for your team, and adjust as you go along.
Want to learn more about optimizing your Jira Service Management setup? Comment below or check out my other JSM guides in the series.


